|
||
|
How to convert TIF files to
JPEG |
||
| If you don't know how to set your digital camera to capture the highest quality jury images possible, read my article on how to set your new digital camera. If you are sending me your images to work on, it's extremely important to maintain all the information in the captured images, especially the pixel dimensions, which will translate into the large file size required by the ZAPP digital jury system. The information on this page can be used to resize/reformat your images so they will still contain all the data but be a small enough file size that they can be e-mailed. If you still have your original camera files and they were taken as JPEGs, you will not need to use this information as the files are small enough to e-mail. But if they have been saved as TIFs, you will need to resize or convert to a high quality JPEG so that the reduced file size can be e-mailed. | ||
| Download the free Irfanview image viewing program and install it. Once installed, you can open your images files by dragging and dropping them onto Irfanview. | ||
|
|
||
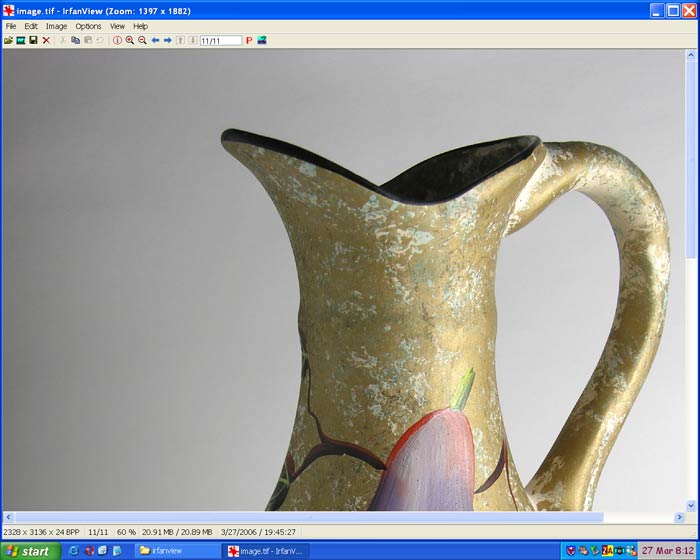
| You can see in illustration #1 that the image overly large. Pixel dimension can be read at the bottom left hand corner of the Irfanview interface. If your long pixel dimension is significantly larger than 3000 pixels, I suggest resizing down so that I have a 50% safety zone to work with. If you plan on having 35mm slides made from the files I've prepared, I suggest not resizing because I'll need all the available pixels to work with. | ||
|
|
||
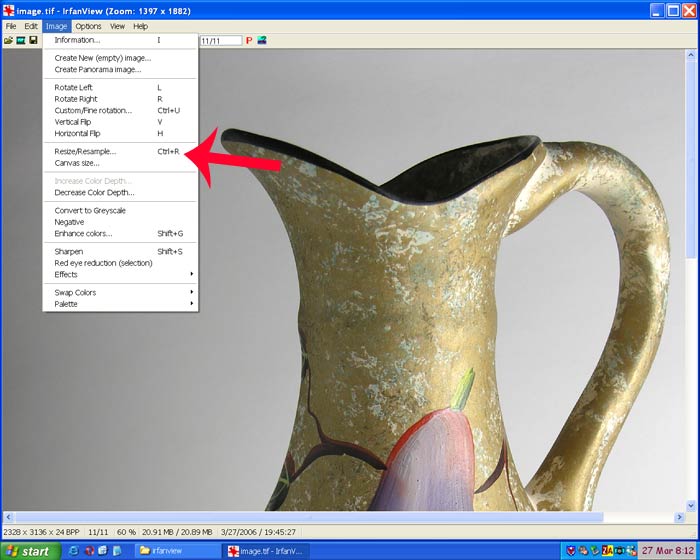
| Illustration #2 shows that the resize option can be reached through Image>Resize/Resample . | ||
|
|
||
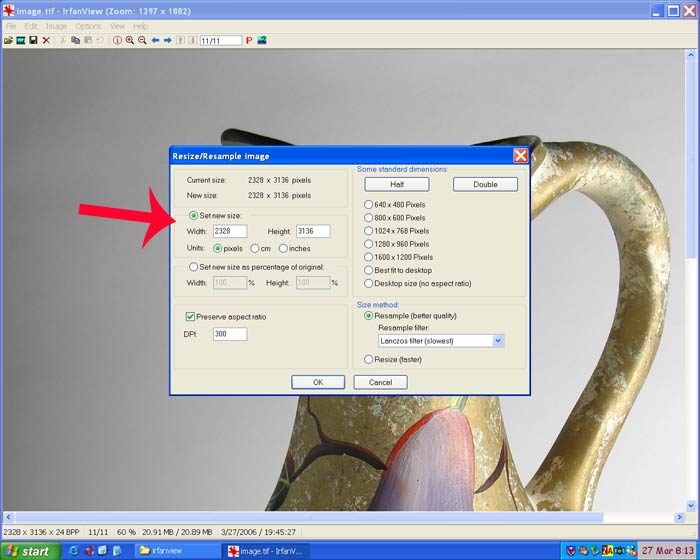
| In Illustration #3, when the Resize/Resample dialog opens, you can change the image size under "set new size." | ||
|
|
||
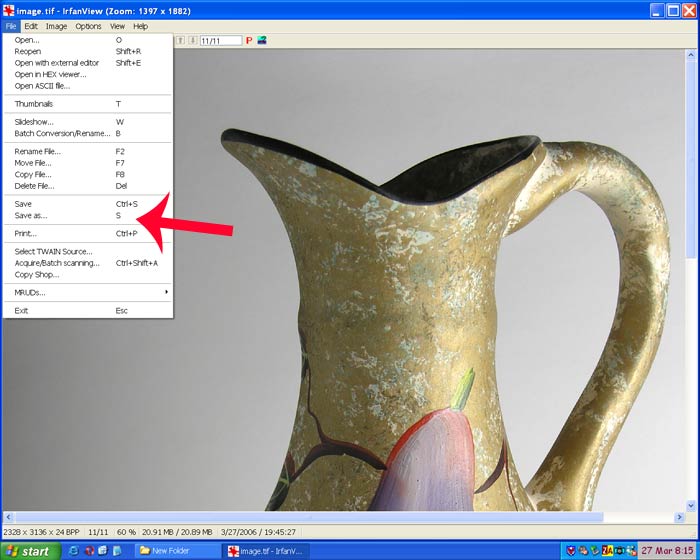
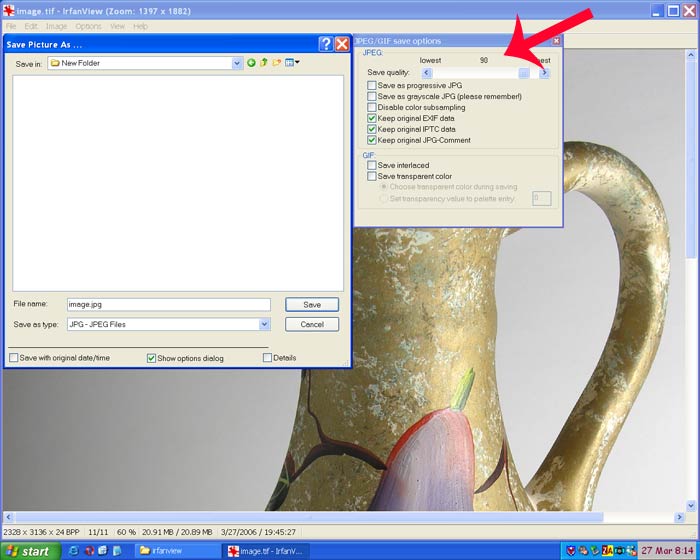
| After making the changes necessary, open the File>Save As dialogue in Illustration #4 | ||
|
|
||
| Last step is to save the image as a high resolution JPEG by choosing a quality level of approximately 90 out of 100. | ||

